SAEDNEWS: How to Install Fonts on a Computer: A Beginner’s Guide

According to Saednews, As you may have noticed in various magazines, articles, and even software like Microsoft Word, text styles and layouts can vary widely. One of the key tools that allows us to create these variations is the font. Today, with a simple search, you can download and install dozens of free fonts in a single ZIP file.

A “font” refers to a set of alphabetic characters designed in a specific style. Different font collections allow you to personalize your text depending on the environment where it will be presented. For example, you can adjust the appearance of your article for Word, PowerPoint, or other applications.
If you have downloaded or purchased fonts but haven’t installed them yet, this guide will show you how to install fonts on your computer.
First, locate the downloaded font file. It might be on your Desktop or in your Downloads folder.
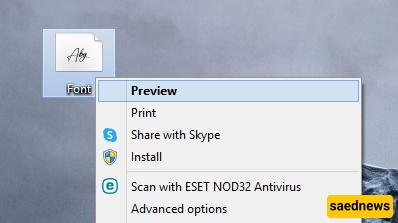
Right-click on the font file.
Select Preview from the menu.
A new window will open showing the font preview.
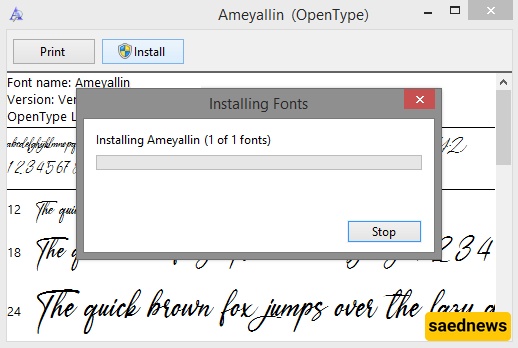
At the top of the window, click the Install button.
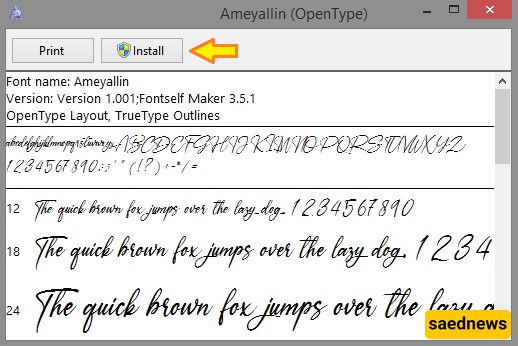
The installation process will begin and usually completes within a few seconds. Once installed, the Install button becomes inactive, indicating that the font has been successfully added to your system.
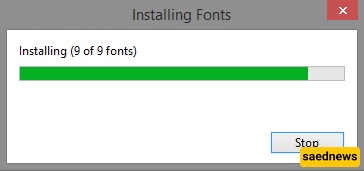
If you want to install several fonts quickly, this method saves time:

Select all the font files you want to install.
Right-click on one of the selected files.
Click Install from the menu.
Windows will install all selected fonts within a few seconds, depending on the number of files.
After installation, you can immediately use the fonts in applications such as Microsoft Word, PowerPoint, and others.