SAEDNEWS: If you’re experiencing slow internet and want to fix it through Windows, this guide will show you how to change your DNS settings.

According to SAEDNEWS, Slow internet can sometimes be one of the biggest annoyances, delaying tasks we planned to complete in a specific timeframe by hours. Fortunately, there are several solutions to improve internet speed, and one of the most common methods among users is changing the DNS, which often resolves the problem significantly. In this guide, we’ll walk you through how to change DNS on Windows.
Step-by-Step Guide:
Right-click the Internet icon in the taskbar at the bottom of your screen.
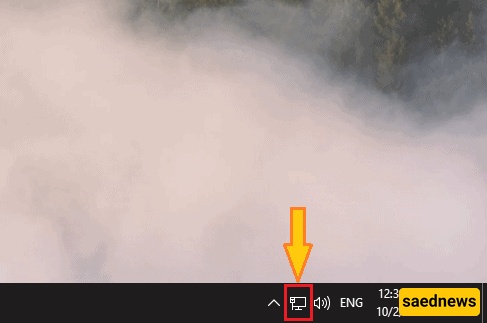
Select Open Network and Sharing Center.

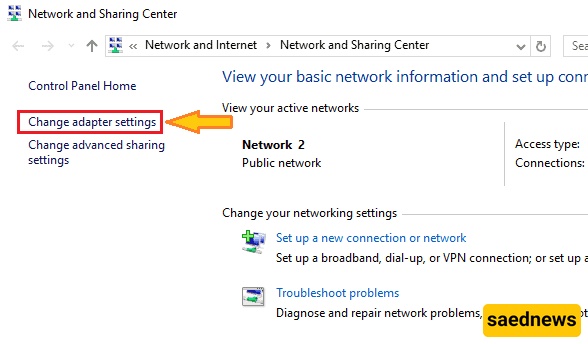
Click Change adapter settings, as shown in the image below.
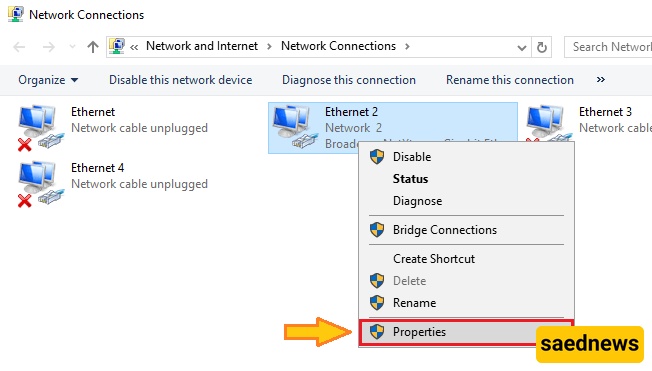
Choose the network you are connected to, right-click it, and select Properties from the options.
Select Internet Protocol Version 4 (IPv4).
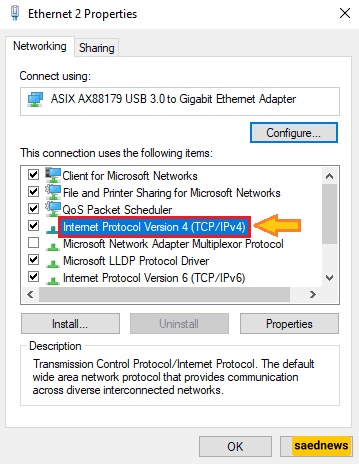
In the window that opens, choose the options shown in the image and enter the DNS addresses you want to use.

To apply the new DNS, click OK at the bottom of the window.