SAEDNEWS: Planting Beans at Home and in Pots for Grades 1–3: The Secret to Fast Sprouting
Planting beans is one of the simplest and most enjoyable home activities. It is both educational for children and pleasant for adults. Because beans grow quickly and require minimal care, they are an excellent choice for a home garden or a pot on a balcony. If you are looking for a hands-on activity for children, the steps for planting beans for primary school (first, second, or third grade) will help you carry out this activity step by step and easily observe the results.
Beans sprout very quickly, and their growth is easy to observe. For this reason, they are an excellent option for teaching young students, especially first graders. This plant does not require special tools and can be grown with a small pot and a sunny window. In addition, observing the stages of bean planting is interesting and relaxing for people of all ages.

Before starting the bean-planting process for school, it is important to choose the type of seed. For home or garden planting, red beans, pinto beans, or green beans are commonly used, each with its own characteristics and needs.
One of the most common types of beans, red beans are easy to grow at home and thrive well in light, moist soil. They germinate quickly and are highly resistant to environmental conditions.
Pinto beans grow well and perform successfully in pots or gardens, provided that they have nutritious soil and enough sunlight.
This type requires slightly more care than other beans and is better planted in larger pots or garden beds to ensure healthy growth and a high-quality harvest.
For germination and early growth, a temperature between 20 and 30°C (68–86°F) is ideal. Temperatures below 10°C (50°F) or above 35°C (95°F) are not suitable for initial growth. Protect the plant from frost and cold nights. Paying attention to proper temperature at each stage helps ensure fast germination and healthy growth.
For garden planting, mid-spring to early summer is the best time. During this period, the risk of frost is gone and air temperatures reach 18–20°C (64–68°F) or higher, which creates optimal conditions for bean growth.
If you plan to plant beans indoors or in a pot by a window, you can do so even in colder seasons such as autumn or winter. You only need to provide adequate room temperature and sufficient sunlight for healthy growth.
Planting beans does not require complex tools. With simple materials, you can grow beans in a pot, cup, or on a windowsill:
Bean seeds (red or pinto)
Transparent container or disposable cup
Cotton or paper towel
Pot or plastic container
Light, nutrient-rich soil
Spray bottle or bottle with small holes
Sunlight or a bright window
Labels or a notebook for recording observations
Whether the goal is a school project or home harvesting, the steps for planting beans for third grade (and younger grades) are simple and fun. Below is a step-by-step guide in clear language.
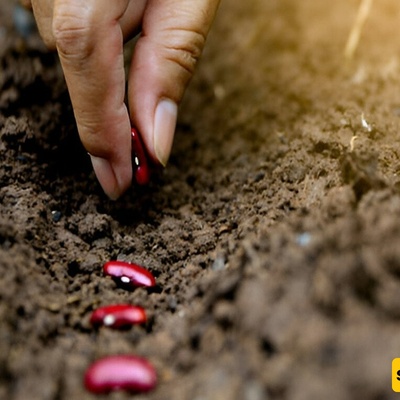
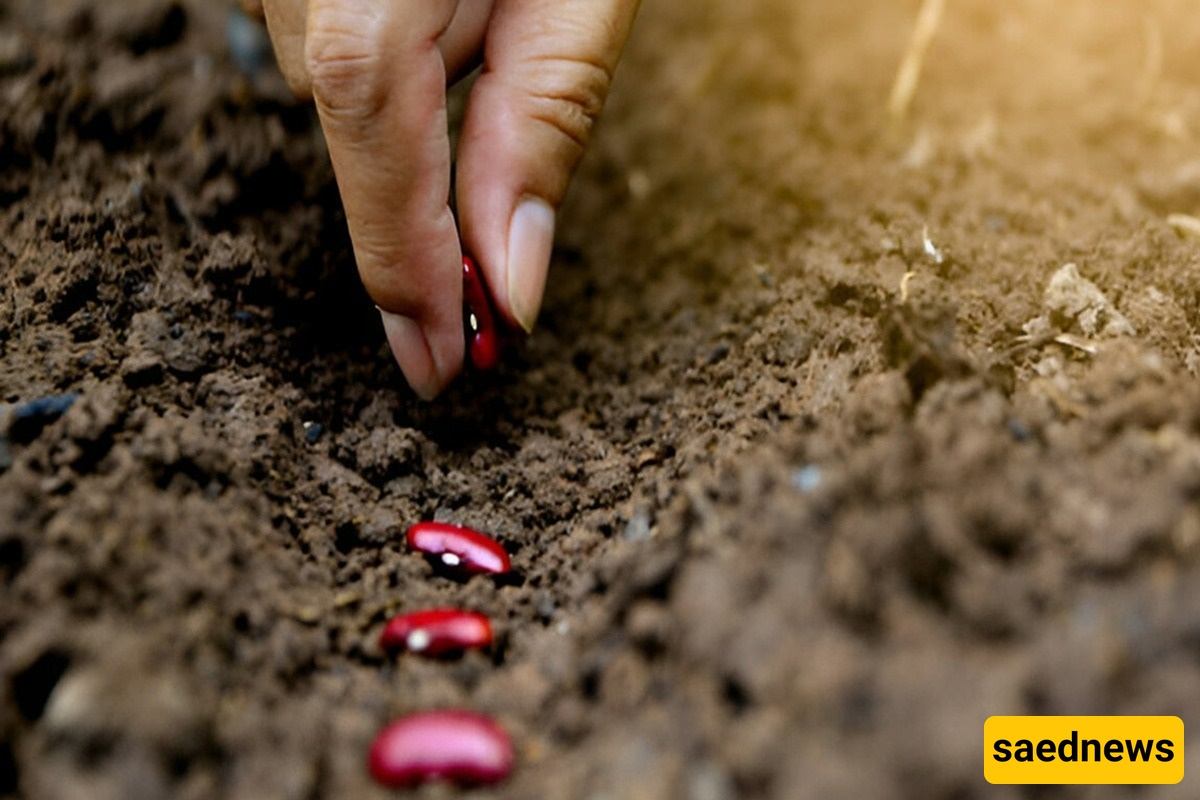
Select one or more healthy red or pinto bean seeds. They should be whole and free of cracks. Red beans are often recommended for school projects because their growth is fast and easy to observe.
Soak the seeds in lukewarm water for 6–12 hours to soften the seed coat and speed up germination. This step helps children better observe changes during growth.
There are two common methods:
Cotton method (for school): Place cotton or a paper towel in a transparent container and moisten it.
Soil method (for home): Prepare a pot with good drainage and light soil.
In the cotton method, place the seeds between two layers of moist cotton.
In the soil method, plant the seeds 2–3 cm (about 1 inch) below the soil surface and cover lightly.
Place the container or pot in a warm, bright location such as a sunny windowsill. The ideal temperature is about 20–25°C (68–77°F).
Add a small amount of water daily to keep the cotton or soil moist. Avoid overwatering or waterlogging.
After about 3–5 days, the first sprouts will appear. The root grows first, followed by the stem. This is a great time to take photos and record growth stages for a school project.
When the sprouts reach about 10 cm (4 inches) and true leaves appear, transfer them from cotton to soil so the plant can grow stronger.

To ensure healthy growth and successful harvesting, follow these simple but important tips, especially after germination:
Use Suitable Soil
Choose light, nutrient-rich soil with good drainage. A mix of garden soil and organic matter works well.
Choose a Pot with Drainage Holes
Make sure excess water can drain out to prevent root rot.
Provide Adequate Light
Beans need plenty of light, but strong direct sunlight can harm young plants. A sunny window is ideal.
Water Properly
Keep the soil or cotton moist, not soaked. Using a spray bottle helps control water quantity.
Rotate the Pot
Turn the pot every few days so the stem grows straight and evenly.
Control Pests
If planted outdoors, watch for ants, snails, or other pests and use natural control methods if necessary.
Fertilize If Needed
After about three weeks, if leaves become pale, you can add a small amount of organic or liquid fertilizer. Fertilizing is usually unnecessary in the early stages.
Transfer the plant when it reaches a height of 10–15 cm (4–6 inches) and develops main leaves.
Transferring the plant is a sensitive stage. By following these steps, you can ensure continued healthy growth:
Prepare the New Soil
Fill the new pot or garden bed with soft, rich soil with good drainage.
Water Immediately After Transferring
Water the plant right away to help the soil settle around the roots.
Remove the Plant Carefully
Lift the plant with some surrounding soil to protect the roots and reduce stress.
Plant Gently in the New Location
Place the plant in a hole the size of the root system and gently press the soil around it.
Protect the Plant in the First Few Days
Keep the plant in partial shade and away from wind and strong sunlight to reduce transplant shock and support early growth.