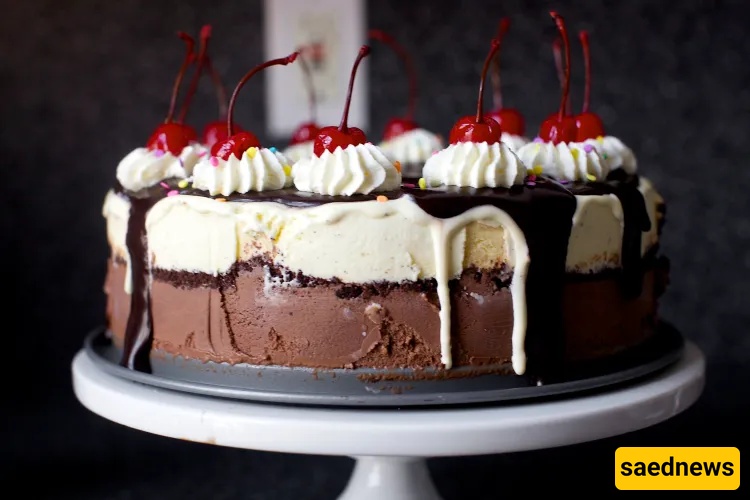
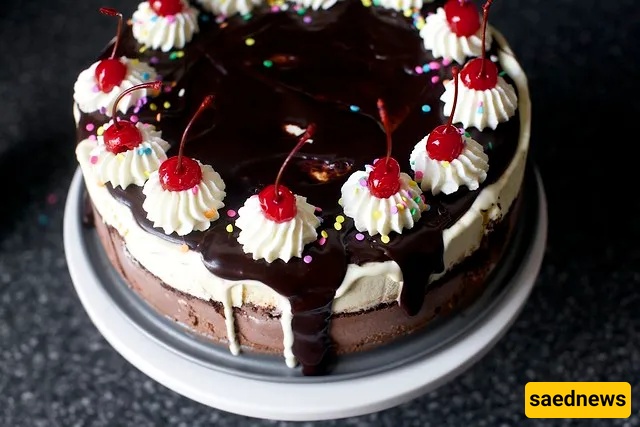
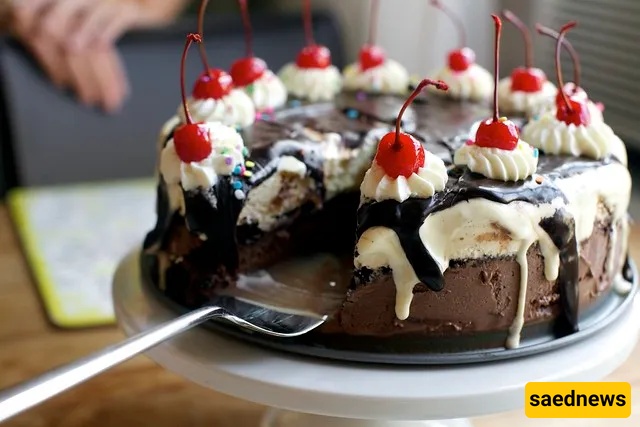
Two ice creams, a cookie crumb base, molten hot fudge and a crown of whipped cream — this hot fudge sundae cake is the summer celebration you didn’t know you needed (but definitely do).
I realize that, given the number of multi-layered, buttercream-sheathed celebration cakes in the archives, you might assume I had spectacular homemade birthday cakes growing up. You’d be right — but they were almost never homemade. Not because I wasn’t cake-deprived, but because every year I asked for the same thing: an ice cream cake, and preferably from Carvel. Specifically the Carvel in the strip mall at the end of the main road. To me it was the perfect June birthday cake — chocolate and vanilla ice cream layers, a scattering of Oreo-ish cookie rubble between them, coated with a suspiciously unbuttery buttercream and dotted with colored sprinkles. It was perfect. I loved it. I saw no reason to change anything.

And it might have stayed that way, except now I have a problem: when I voice the daydreams that pass through my head — “What would it be like to make an ice cream cake from scratch… no, a sundae cake… no! A hot fudge sundae cake, with hot fudge, whipped cream and those awful-but-I-love-them jarred cherries…” — my so-called loved ones don’t say, “That’s ridiculous — buy one.” They encourage me. They goad me. Then they applaud and say “Again!” (True story: we think “Again!” was the kid’s first joyful word.) And then things like this happen.
Before we go further, I must confess: making a hot fudge sundae cake with homemade chocolate and vanilla ice creams, homemade Oreo-like cookie crumbles, homemade hot fudge, homemade whipped cream and—of course—storebought maraschino cherries is absolute madness. There is no sane reason to do all of it. You could buy premium ice creams, Oreos, hot fudge, canned whipped cream and jarred cherries and still assemble an excellent sundae cake. You could also make only some components (cookies, the ice creams, or just the fudge) and still be perfectly reasonable with well-fed friends. I repeat: there’s no rational reason to make everything from scratch.
But if you wanted to be gloriously insane, I’ll give you a guided tour. I might even whisper the nine words that get us into these projects: “It’s really not as much work as it seems.” Or just trust me — the local soft-serve joint has nothing short of a whale pan on the full-on home version. It’s The Summer Cake To End All Summer Cakes; swan-dive in if you dare.
Hot Fudge Sundae Cake
Here’s the sane shortcut recipe: 2 pints (or 1 quart) chocolate ice cream + 2 pints (or 1 quart) vanilla ice cream + about 14 ounces chocolate cookies (Oreos or wafers), ground (≈2 3/4 cups) + bottled hot fudge sauce + canned whipped cream + jarred maraschino cherries. Below are instructions for making any or all of the components yourself; choose your adventure. What matters is that all roads lead to The Summer Cake To End All Summer Cakes — a cooling, air-conditioning unit of a celebration cake to get you through the heat wave.
Recipe changes from the photos you see: My only regrets in making this cake were not having a cookie crumb base (it makes slices easier to remove from the pan), so I’ve included one here. I also wanted more cookie crumb filling than I used (I increased it here to 3/4 cup). I also recommend “pre-fudging” the cake: pour some hot fudge over the top, freeze 30 minutes, then add warmer fudge just before serving. That softens the final fudge while protecting the top ice cream layer from excessive melting.
Sources: The chocolate and vanilla ice creams are adapted (merged for efficiency) from David Lebovitz’s The Perfect Scoop. The cookie crumbs are adapted from Wayne Brachman’s Retro Desserts and have previously appeared on this site as Homemade Oreos, further simplified here. The hot fudge sauce is adapted from the late Gourmet magazine. The whipped cream was made from scratch here, though canned whipped cream is a perfectly reasonable shortcut for quick decorating. Cherries are from a jar; if you must make them, Melissa Clark provides guidance. Whee!
Serves: 12 to 16
Yield: 1 quart chocolate and 1 quart vanilla (instructions combined to avoid repetition)
Ingredient | Amount / Notes |
|---|---|
Heavy cream | 4 cups, divided |
Vanilla bean | 1 split (for vanilla batch) |
Unsweetened Dutch-process cocoa powder | 3 tablespoons (chocolate batch) |
Bittersweet or semisweet chocolate, chopped | 5 ounces (chocolate batch) |
Whole milk | 2 cups |
Granulated sugar | 1 1/2 cups |
Pinch of salt | — |
Egg yolks | 10 |
Vanilla extract | 1 1/2 teaspoons, divided |
Part 1 Instructions
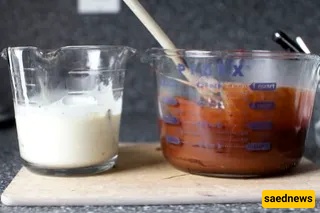
Prepare chocolate cream: Warm 1 cup of the cream with the cocoa in a medium saucepan, whisking to combine. Bring to a boil, then lower heat and simmer very briefly (about 30 seconds), whisking. Remove from heat, add the chopped chocolate, and stir until smooth. Stir in the remaining 1 cup cream.
Prepare vanilla cream: Heat 1 cup cream to a simmer. Scrape the vanilla seeds into the cream and add the pod; cover and remove from heat to infuse for one hour. After infusing, remove the pod and stir in the remaining 1 cup cream.
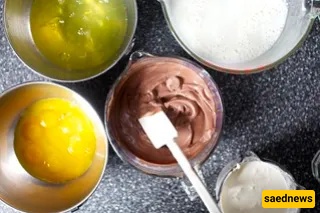
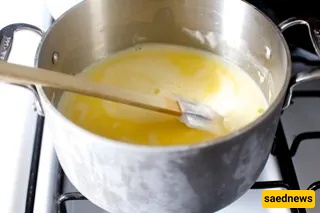
Make the custard for both ice creams: Warm the milk, sugar, and salt in a saucepan and transfer to a spouted measuring cup. Whisk the egg yolks in a bowl, then slowly pour the warm milk mixture into the yolks while whisking. Return the yolk/milk mixture to the saucepan and cook over medium-low, stirring constantly and scraping the bottom, until the custard thickens enough to coat a spatula. Strain the custard.
For chocolate: Stir half the custard into the chocolate cream until smooth, then add 1/2 teaspoon vanilla.
For vanilla: Stir the other half of the custard into the vanilla cream, then add 1 teaspoon vanilla extract.
Chill both mixtures in the refrigerator until thoroughly cold — ideally overnight. (You can speed this using an ice bath; the mixture should feel very cold before churning.)
While chilling, make or prepare the cookie crumbs so they’re ready for the cake base before churning.
Yield: About 48 cookies (≈96 ounces total — double what you need; extra cookies keep well)
Ingredient | Amount / Notes |
|---|---|
All-purpose flour | 1 1/4 cups |
Unsweetened Dutch-process cocoa | 1/2 cup |
Baking soda | 1 teaspoon |
Baking powder | 1/4 teaspoon |
Salt | 1/4 teaspoon |
Sugar | 1 1/2 cups |
Unsalted butter, cold, cut into chunks | 1/2 cup + 2 tbsp (1 1/4 sticks) |
Large egg | 1 |
For Crumb Crust
Ingredient | Amount |
|---|---|
Chocolate cookie crumbs | 1 1/3 cups (from about 6 oz whole cookies) |
Unsalted butter, melted | 3 tablespoons |
Part 2 Instructions
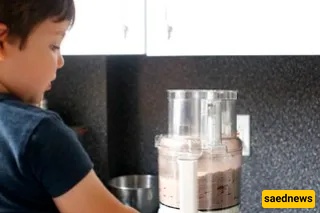
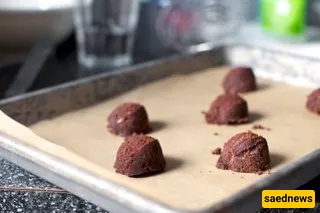
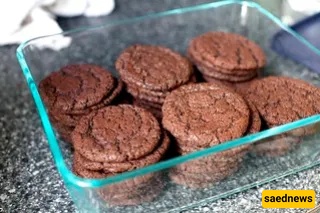
Make cookies: Preheat the oven to 375°F. Line two baking sheets with parchment. In a food processor, combine flour, cocoa, baking soda, baking powder, salt, and sugar. Add the butter and pulse until the mixture is powdery. Add the egg and process until the dough begins to clump, about 30 seconds. Scoop dough onto baking sheets, leaving space for spreading — they will spread a lot. Bake 9–10 minutes; the cookies will look underbaked but will firm up once removed. Transfer to racks and let cool completely.
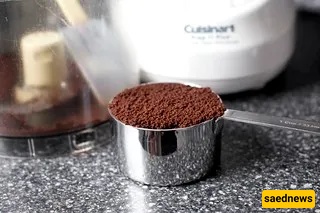
Grind about half the cookies to make crumbs; you’ll want 2 3/4 cups total.
Make the chocolate cookie crust: Mix 1 1/3 cups chocolate crumbs with melted butter and press evenly into the bottom of a 9-inch springform pan with 2 3/4–3 inch sides. Freeze until firm, about 10 minutes.
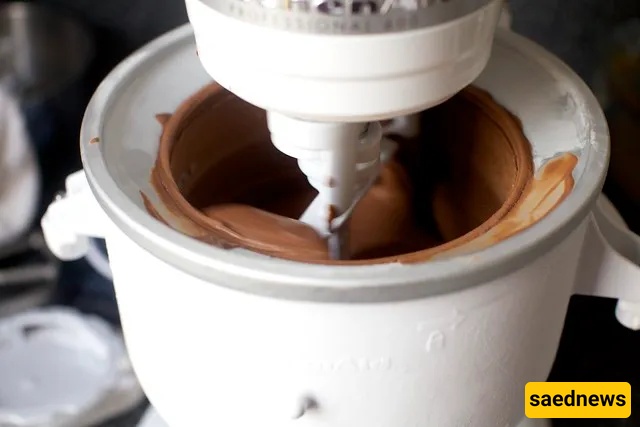
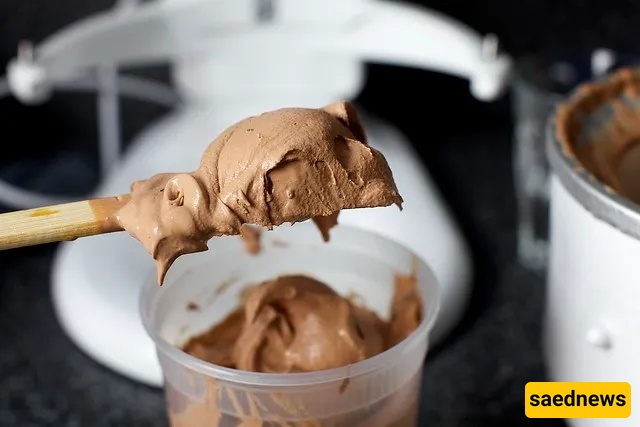
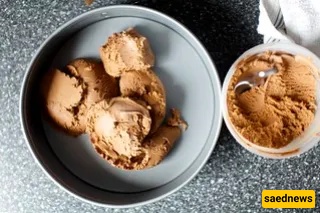
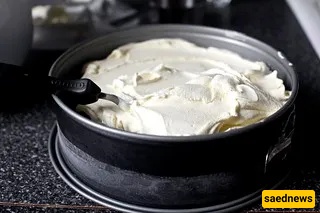
Churn and layer chocolate ice cream (first cake layer): Churn chocolate ice cream according to your machine’s directions; when it reaches a soft-serve consistency, spread it over the prepared crumb crust in the freezer. Don’t obsess over a perfectly smooth top; finish once the layer is firm. Freeze 1–2 hours until firm, then smooth with an offset spatula if desired.
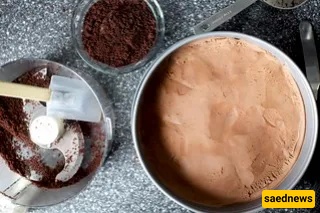
Add cookie crumb filling: Wipe any ice cream smudges from the springform sides. Spread 1 1/4 cups chocolate cookie crumbs (≈11–12 whole cookies) evenly over the firm chocolate layer and press lightly with parchment to merge crumbs a bit into the ice cream.
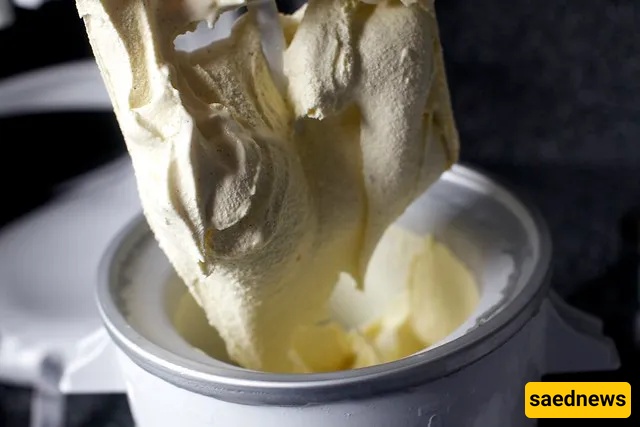
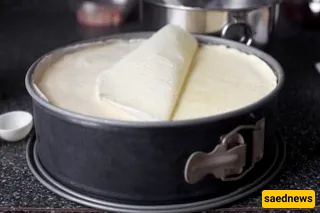
Churn and layer vanilla ice cream (second cake layer): Churn vanilla ice cream and, at soft-serve stage, spread it over the cookie crumb filling, pressing to the edges rather than dragging crumbs up into the vanilla. Freeze 1–2 hours until firm. If pausing overnight, press a circle of waxed or parchment paper against the vanilla to prevent drying or ice crystals.
Yield: ~2 cups
Ingredient | Amount |
|---|---|
Heavy or whipping cream | 2/3 cup |
Light corn syrup or golden syrup | 1/2 cup |
Packed dark brown sugar | 1/3 cup |
Unsweetened cocoa powder (Dutch if possible) | 1/4 cup |
Fine sea salt or table salt | Heaping 1/4 teaspoon or level 1/4 tsp |
Bittersweet chocolate, chopped (or chips) | 6 ounces (about 1 cup chips), divided |
Unsalted butter | 2 tablespoons |
Vanilla extract | 1/2 teaspoon |
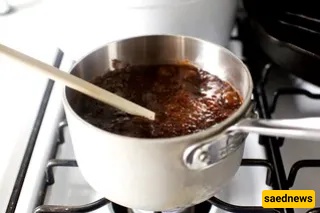
Part 3 Instructions
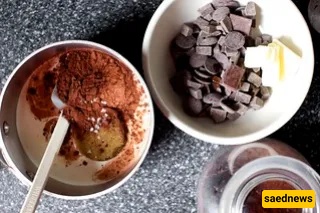
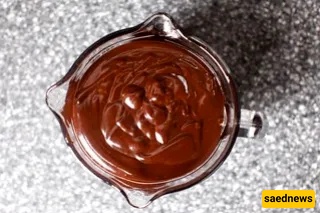
In a heavy 1½–2 quart saucepan, bring the cream, syrup, brown sugar, cocoa, salt, and half the chocolate to a boil. Reduce to a low simmer and cook, stirring occasionally, for about 5 minutes. Remove from heat and stir in the remaining chocolate, butter, and vanilla until smooth. Cool the sauce to lukewarm so it thickens before serving.
Ingredient | Amount / Notes |
|---|---|
Heavy or whipping cream | 1 cup |
Sugar | 2 tablespoons |
Maraschino cherries | As needed |
Colored sprinkles | As needed |
Part 4 Instructions
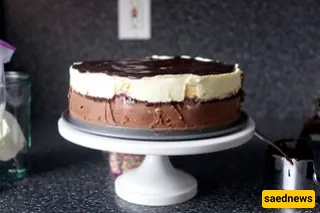
“Pre-fudge” the cake: Once the vanilla layer is firm in the freezer and with the springform sides still on, pour a puddle of lukewarm hot fudge over the top and return the cake to the freezer for 30 minutes. This helps the final fudge application not to melt the top layer.
Make the whipped cream: Beat cream and sugar with an electric mixer until soft-to-firm peaks form. Transfer to a piping bag fitted with a star tip and refrigerate until needed. (Author’s note: canned whipped cream is a perfectly acceptable shortcut if you prefer.)
Finish and serve the cake: Once the pre-fudge has set, remove the cake from the freezer. Loosen by carefully cutting around the pan, then remove the springform sides and transfer the cake to a serving platter. Pour more lukewarm (or briefly reheated) hot fudge around the edges to drip down slightly.
Quickly decorate: Pipe about a dozen dollops of whipped cream around the crown, top each with a cherry, and scatter with sprinkles.
Serve with extra hot fudge on the side. Store any leftovers in an airtight container in the freezer.
Field | Info |
|---|---|
Serves | 12 to 16 |
Yield | 1 quart chocolate ice cream, 1 quart vanilla ice cream, ~2 cups hot fudge |
Time | Not precisely specified (chilling and freezing stages require hours/overnight) |
Difficulty | Advanced if making all components; shortcut version available |
Source | Adapted from David Lebovitz, Wayne Brachman, Gourmet magazine; assembled here |
Tip |
|---|
You can shortcut this by using storebought premium ice creams, ground cookies (Oreos), bottled hot fudge, canned whipped cream and jarred cherries — still excellent. |
Make a cookie crumb base — it makes slices easier to remove from the springform pan. |
“Pre-fudge” the cake (pour lukewarm fudge over the frozen top, freeze 30 minutes) to protect the top layer from melting when you add the final warm fudge. |
Chill custards and creams thoroughly (overnight preferred) before churning; ice creams should be very cold for best churning results. |
If pausing between layers, press waxed/parchment paper against the frozen ice cream to prevent freezer burn or icy fuzz. |