Nostalgic, almondy and unexpectedly doable — these seven-layer cookies are bakery petit-fours you can make at home if you’re willing to wait.
Most of my cookie preferences are predictable: browned butter, twice-baked shortbread, nutty sables, dense chocolates and the occasional stacked or filled bite — always compact and small. They’re simple, too; after all, it takes under 10 seconds to eat one, so I focus on intense flavor rather than fussy technique.


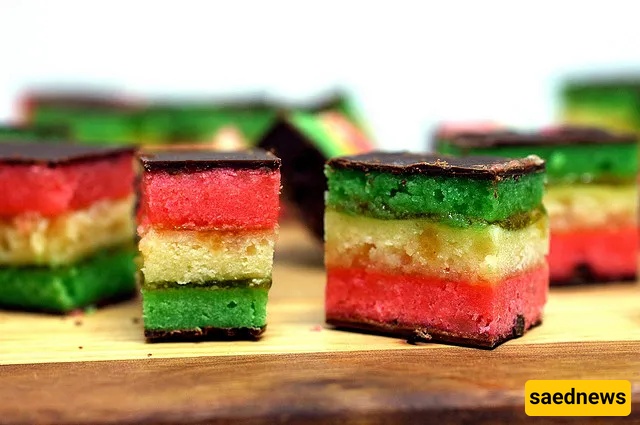
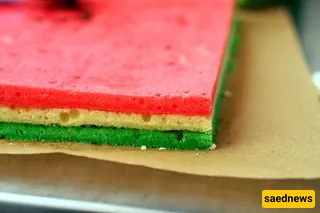
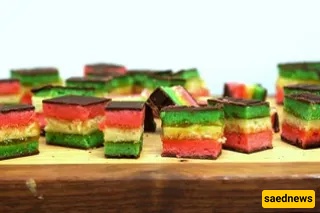
But if I were to make an exception to that simplicity rule, it would be for rainbow or seven-layer cookies. More like petit-fours, these stacked almond cakes with apricot filling and a chocolate coating are staples in Italian-American bakeries and I’ve loved them forever. They always wear the same three colors — pink, white and green — even though those hues come largely from food coloring; their signature stripes are part of the charm.
Yet most seven-layer cookies available today disappoint. Artificial almond flavoring often dominates, and few bakeries bother to make them in-house anymore — they’re left to nostalgic customers. Factory versions might look perfect, but they rarely taste right. That’s why these cookies are begging to be made at home. If you’re up for it, that is — and apparently I was.
Despite putting it off for years for reasons such as time, counter space and fear of disappointment, I spent most of a Saturday in a surprisingly good mood because these turned out to be shockingly easy. They’re not fast, but the method is straightforward: once the layers are baked (which doesn’t take long) it’s mostly assembly. The result is everything bakery seven-layer cookies should be again: dense, intensely almondy cake, bitter chocolate to balance the sweetness, and just the right amount of jam. They’re also very pretty — I hope they never go out of style.
Need a gluten-free version? Jill at Hey, That Tastes Good! has already made one that looks excellent.
Almost perfect as printed in Gourmet, December 2005, but with many added notes at the end
I have so many extra hints and notes that I’ve moved them to the bottom. Read on!
Makes about 5 dozen cookies (or more, if you cut them smaller)
Time: These take at least 11 hours from beginning to end, most of it inactive, but be sure you have a solid 2–3 hour window.
Yield | Active time | Total time | Oven temp |
|---|---|---|---|
~5 dozen (depending on cut) | 2–3 hours (hands-on) | ~11 hours (mostly inactive/chill time) | 350°F (177°C) |
Ingredient | Amount |
|---|---|
Large egg whites | 4 (separated) |
Granulated sugar | 1 cup (200 g) |
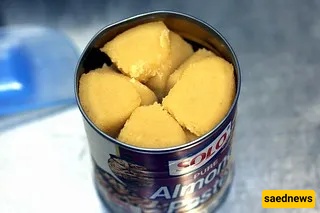
Almond paste | 1 (8-oz / 225 g) can |
Unsalted butter, softened | 1 1/4 cups (10 oz / 285 g / 2 1/2 sticks) |
Almond extract | 1 teaspoon (5 ml) |
All-purpose flour | 2 cups (260 g) |
Kosher salt | 1/2 teaspoon |
Red food coloring | 25 drops |
Green food coloring | 25 drops |
Ingredient | Amount |
|---|---|
Apricot preserves, heated & strained | 1 (12-oz / 340 g) jar |
Bittersweet chocolate (not unsweetened) | 7 oz (200 g), chopped |
(For finishing) butter/pan preparation | Butter pan and line with wax paper |
Put an oven rack in the middle position and preheat to 350°F. Butter a 13-by-9-inch baking pan and line the bottom with wax paper, leaving a 2-inch overhang on two ends; butter the paper as well.
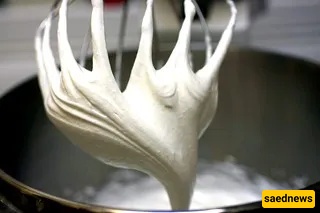
Beat the egg whites in a mixer fitted with the whisk attachment at medium-high speed until they hold stiff peaks. Add 1/4 cup sugar gradually, beating at high speed until the whites are stiff and slightly glossy. Transfer the whites to another bowl.
Switch to the paddle attachment and beat together the almond paste and the remaining 3/4 cup sugar until well blended, about 3 minutes. Add the butter and beat until pale and fluffy, about 3 minutes. Add the yolks and almond extract and beat until well combined, about 2 minutes. Reduce speed to low and add the flour and salt, mixing just until combined.
Fold half of the egg white mixture into the almond mixture to lighten it, then gently fold in the remaining whites until evenly incorporated.
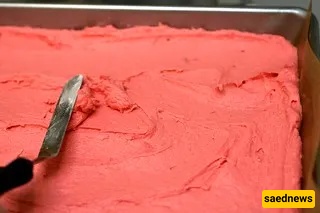
Divide the batter among three bowls. Stir the red food coloring into one bowl and the green food coloring into another, leaving the third plain. Set the white batter aside and chill the green batter, covered. Pour the red batter into the prepared pan and spread evenly with an offset spatula to about 1/4-inch thickness.
Bake the red layer 8–10 minutes, until just set; undercooking slightly is important. (They may look not quite done, but a tester should come out clean.)
Using the paper overhang, transfer the layer to a rack to cool about 15 minutes. Clean and re-prepare the pan (line with parchment or wax paper and butter), then bake the white layer in the same manner. While the white layer bakes, bring the green batter to room temperature. Transfer the white layer to a rack. Prepare the pan again and bake the green layer; transfer to a rack to cool.
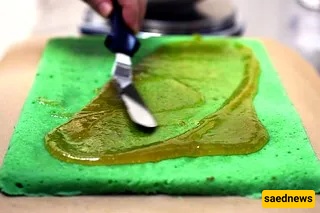
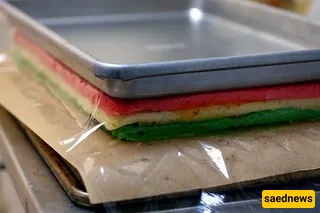
When all layers are cool, invert the green layer onto a parchment-lined large baking sheet and discard its paper. Spread half of the apricot preserves over the green layer. Invert the white layer on top of the green, discarding its paper, and spread the remaining preserves over the white layer. Invert the red layer onto the white layer and discard the wax or parchment.
Cover the stacked layers with plastic wrap and weight them with a large baking pan. Chill at least 8 hours.
Remove the weight and plastic. Bring the layers to room temperature. Melt the chocolate in a double boiler or a metal bowl over barely simmering water, stirring until smooth. Keep the chocolate over the warm water. (Alternatively, the author melted smaller portions at a time to prevent seizing.)
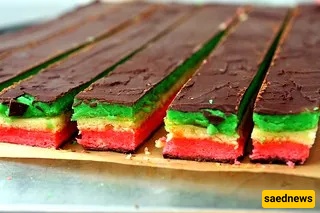
Trim the edges of the assembled layers with a long serrated knife. Quickly spread half of the chocolate in a thin layer on top of the cake. Chill uncovered until the chocolate firms, about 15 minutes. Cover with another sheet of wax paper, place a baking sheet on top, then invert the cake onto the sheet and remove the paper. Quickly spread the remaining chocolate and chill again until firm, about 30 minutes.
Cut the cake lengthwise into 4 strips (the author cut more narrowly to make 1–1.5-inch wide strips). Then cut the strips crosswise into 3/4-inch-wide cookies.
Do ahead: Store the cookies layered between wax or parchment in an airtight container at room temperature for up to 2 weeks; they keep even longer in the freezer.
Tip | |
|---|---|
Don’t stack cooled cakes while still on their paper liners — the grease prevents chocolate adherence. | “DON’T DO THIS… the paper liner is greased on both sides… the chocolate shell never quite stuck right.” |
Divide jam carefully — account for solids lost during straining when measuring. | “if you’re using a scale to make two six-ounce divisions of jam, remember that you’ve probably strained out a good ounce… Your divided amounts will be less than six ounces each.” |
Cookies cut far more cleanly when frozen — freeze before slicing if you want neat edges. | “these cut fantastically when frozen.” |
Underbake the layers slightly — they should be just set, not overcooked. | “It is important to undercook. They’ll look like they’re not done, but a tester does come out clean.” |
Chill assembled layers weighted for at least 8 hours to firm before coating. | “Cover with plastic wrap and weight … Chill at least 8 hours.” |
Three important notes:
Don’t stack cooled cakes: The author accidentally stacked cooled layers with their parchment liners between them to save space, which left grease on the cakes and caused the chocolate shell to fail to stick properly. Many cookies were ruined when the chocolate peeled off.
Be careful dividing your jam: The author misdivided the preserves, leaving too much in one spot and too little in another. Excess jam oozed and made slicing difficult; remember that strained jam weighs less than the jar amount.
They’re easier to cut when frozen: Cutting was difficult because the textures differ between the hard chocolate shell and the soft cake layers. A serrated knife blunted by jam pulls at the layers; frozen cookies slice cleanly.