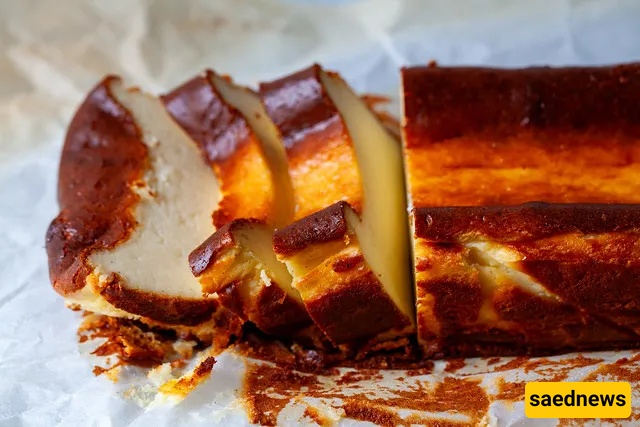
Cold cream cheese, five minutes in a blender, and a gloriously scorched top — this petite Basque cheesecake is proof that the simplest tricks make the most addictive desserts.

I don’t know if the internet really needed another recipe for burnt Basque cheesecake, but apparently I did. And since you’re here with me, pull up a chair — because we truly can’t get enough of this version.
What is burnt Basque cheesecake? Also known as San Sebastián cheesecake, it was created in the late ’80s by Santiago Rivera at his restaurant and pintxo bar, La Viña, in San Sebastián, Spain. Unlike American-style cheesecake, it skips the graham cracker crust entirely. Rivera once explained that he wanted the cream cheese to melt directly on the palate, like chocolate mousse, with nothing to get in the way.
This cheesecake is also distinct in how it’s served and baked: it’s often eaten closer to room temperature, so it feels lighter, almost flan-like thanks to heavy cream. It’s baked at a high heat until the top is deeply bronzed and caramelized, contrasting beautifully with its custardy interior. And here’s the best part: no water bath. Cracks and sunken centers? That’s the point. Rustic is the style.
So what did I want that other recipes didn’t offer?
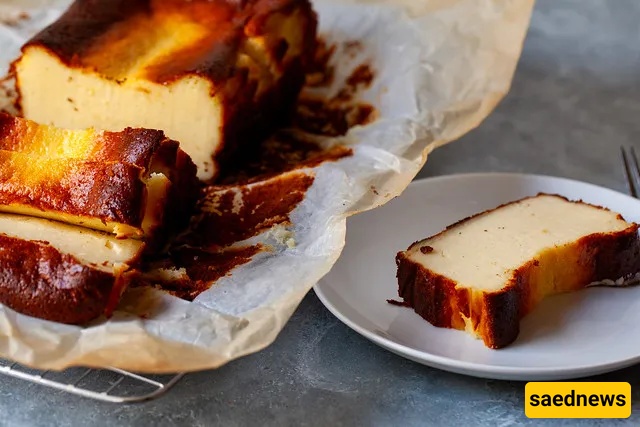
First, less. Cheesecake so often feels like too much — a massive springform pan with pounds of cream cheese, endless eggs, and an hour-plus in the oven. My solution was to scale it down: a petite loaf version that bakes in 45 minutes, slices neatly, and is portable enough to tuck into a shopping bag.
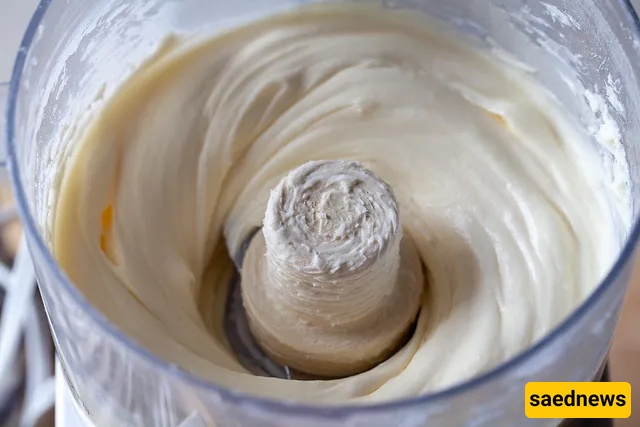
Second, speed. I wanted a true 5-minute batter — not after waiting for cream cheese to soften, but five minutes flat. With a food processor or blender, cold cream cheese becomes silky in under a minute. Room temperature? Never again.
Finally, I skipped the flour and used cornstarch instead, which keeps it naturally gluten-free and gives it the smoothest, dreamiest texture.
As tempting as it was to top it with cherry syrup or sherry-spiked whipped cream, we’ve found it’s best left as is — pure, simple, and irresistible. Which means one thing: you’ll find yourself making it twice as often.
Amount | Ingredient |
|---|---|
2/3 cup (130 g) | granulated sugar |
1/3 cup (45 g) | cornstarch |
1/2 tsp | kosher salt |
1 lb (2 × 8-oz / 454 g) | cream cheese |
3 large | eggs |
2 tsp (10 ml) | vanilla extract (or 1 tsp extract + 1 tsp vanilla bean paste) |
2 tbsp (30 ml) | lemon juice |
1 cup (235 ml) | heavy cream |
— | parchment paper for lining |
— | loaf pan (see notes for size) |
Heat oven & prep pan
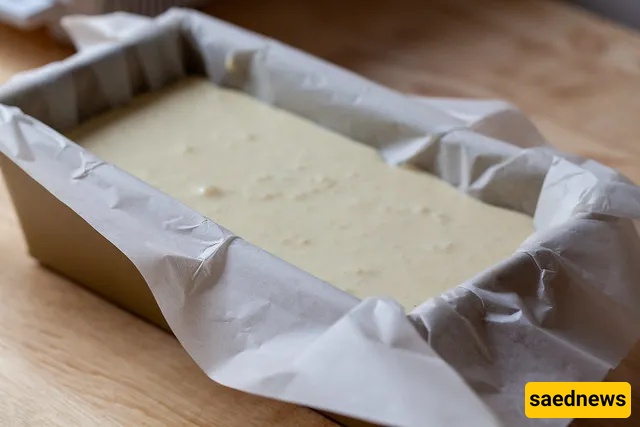
Heat oven to 425°F (218°C). Line a loaf pan with a single large sheet of parchment pressed into the corners and up the sides; leave an extended parchment sling over the rim. Place the lined loaf pan on a rimmed baking sheet (catches any overflow).
Make batter (food processor / high-speed blender method — cold cream cheese OK)
Blend sugar, cornstarch, and salt in the empty bowl to combine (lid on — cornstarch dust will puff otherwise).
Cut cold cream cheese into large chunks and add; blend until completely combined and soft, scraping down once or twice.
Add eggs one at a time, blending to combine and scraping down between additions. With the third egg, add vanilla and lemon juice before blending and scraping down once more.
Add cream and blend until evenly combined. (Total active time ~5 minutes; cream cheese can be cold for this method.)
Alternative: hand mixer method (softened cream cheese required)
Combine sugar, cornstarch and salt in a large bowl. Add softened cream cheese and beat until smooth, scraping down the bowl a few times. Add eggs one at a time, beating and scraping between each. With the third egg add vanilla and lemon juice. Pour in the cream and beat on low until combined.
Bake
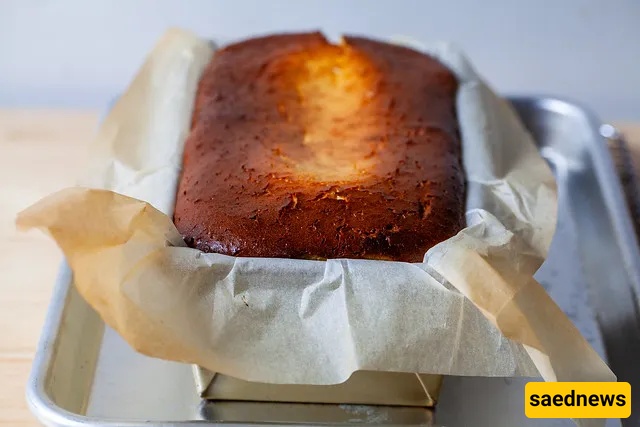
Pour batter into prepared pan, making sure it all lands inside the parchment sling. Transfer to oven and bake 40–50 minutes or until puffed, deeply golden brown and moderately jiggly when the pan is shimmied. (Internal temps of ~190–200°F have been reported by the author.) The top will be darkly caramelized in areas — rusticity is intentional.
Cool & serve
Transfer pan to a wire rack and cool at room temperature for 1–2 hours, or cool in the fridge for 1 hour. Use the parchment sling to lift the cake from the pan, slice into just-under-1-inch pieces. Serve at room temperature (traditional) or cool — both are delicious.
Cream cheese temperature: If using a food processor or blender, cream cheese may be cold; if using a hand mixer, cream cheese should be softened to room temperature.
Loaf pan size: Pan matters — the author’s pan holds 6 liquid cups (≈1420 ml) and measures roughly 8×4 inches (bottom) / 9×5 inches (top). The batter fills the pan almost completely. If your pan is smaller, remove a bit of batter and bake in muffin cups. Always place pan on a rimmed sheet to catch overflow.
Baking temperature choice: 425°F (218°C) for 40–50 minutes gives a deeply brown top but not completely black; 450°F bakes faster (~40 min) and yields a darker top. If yours is not dark enough, bump the temp next time.
Texture: Cornstarch is used instead of flour for a silkier, gluten-free finish. The center is supposed to be slightly jiggly when done and will set as it cools. Rustic cracks or a sinking center are normal for this style.
Storage: Keeps 5–7 days in the fridge; serve at room temperature or slightly chilled.
Chocolate Basque Cheesecake: Melt ~5.5 oz chopped semisweet chocolate into a splash of cream, cool by whisking in the rest of the (cold) cream, then add to the batter when the recipe calls for the cream. Omit lemon juice. The pan will be even fuller—use the parchment sling and tray to avoid mess.
Extra-dark top: Try 450°F for a shorter time (approx. 40 min) if you want a more dramatically charred surface.
If top is browning too slowly: increase oven temp slightly and watch closely.
If batter overflows: reduce fill volume next time or use a larger loaf pan.
Want a quicker cleanup? Use the parchment sling generously—it lifts the cake out cleanly.