The art of pyrography, or "pyrography," first emerged about three thousand years ago in ancient Greece and later developed traditionally in European, Asian, Australian, and American countries for decorating objects such as musical instruments and kitchen utensils. Join us to get to know this art in this article.
Pyrography, also known as woodburning, is the art of decorating wood or other materials with burn marks caused by the controlled application of a heated object such as a poker (a fireplace rod or wire). It is also known as pokerwork or woodburning.
Woodburning on wood, or pyrography on wood, is an art with a long history, practiced in various forms throughout different eras. It can be done using modern specialized pyrography tools, or by using a heated metal structure in fire, or even sunlight focused through a magnifying glass.
The usual method is hot branding, where a metal object is heated in fire and then pressed onto the wood. This metal might have a specific shape to imprint a pattern on the wood (like a brass stamp used by instrument makers to engrave their name on a flute).
This art allows access to a wide range of colors and shades. Differences in the tip type, temperature, or how the iron tool is used on the material all create different effects. After burning the design, wooden objects are often painted.
Light-colored hardwoods like plane tree, basswood, beech, and poplar are commonly used because their fine grain is not dense. However, other woods like maple, pine, or oak are also used.
Pyrography is also applied on leather, which lends itself to bold designs and very subtle shading. In leather burning, vegetable-tanned leather is preferred (because modern tanning chemicals in leather can be toxic when burned), usually in lighter shades to create good contrast.
Pyrography is also popular among artisans who decorate the hard outer shell of dried gourds by burning designs onto them.

The exact origin of this art is unknown, but some believe it dates back to the dawn of recorded history, used by cultures such as the Egyptians and some African tribes. Robert Boyer, a pyrographer, suggests its artistic form goes back to prehistoric times, when early humans created patterns using charred remains of their fires—essentially the discovery of fire itself.
The oldest wooden artifact found is a wooden comb from the archaeological excavations of the Burnt City (Shahr-e Sukhteh) near Zabol, dating back to the 5th millennium BC. Some experts believe the patterns on it are entirely Iranian.
During the Achaemenid period, wood was commonly used in architecture, for example, in buildings in Susa and Apadana, where Iranian oak and Lebanese cedar trees were used. Before the widespread use of iron in construction, Persepolis had the largest wooden base surfaces, but all these wooden artifacts were lost to fires. Between the fall of the Safavid dynasty and the Qajar period, this art was forgotten.
In the early Seljuk period, pyrography was done on leather by transferring a design onto the leather and burning it with heated rods, mainly used on fine handwritten book covers, especially Qur’ans. By the late Seljuk and early Timurid eras, this art transitioned from leather to wooden objects, especially bases for wooden figurines.
In Iran, woodburning art reached its peak during the Safavid era, but over time, due to the difficulty of working on wood, the number of these works decreased and the art was forgotten.
In China, this art was known since the Han dynasty, called “needle embroidery with fire or heat.” During the Victorian era, the invention of pyrography machines sparked widespread interest in handicrafts, and the term “pyrography” was coined (previously “pokerwork” was more common).
In the late 19th century, a Melbourne architect named Alfred Smart discovered that water-based paints could be applied hot to wood by pumping benzoline vapor through a heated hollow platinum pencil. This innovation advanced pyrography with shading and coloring techniques that were previously impossible.
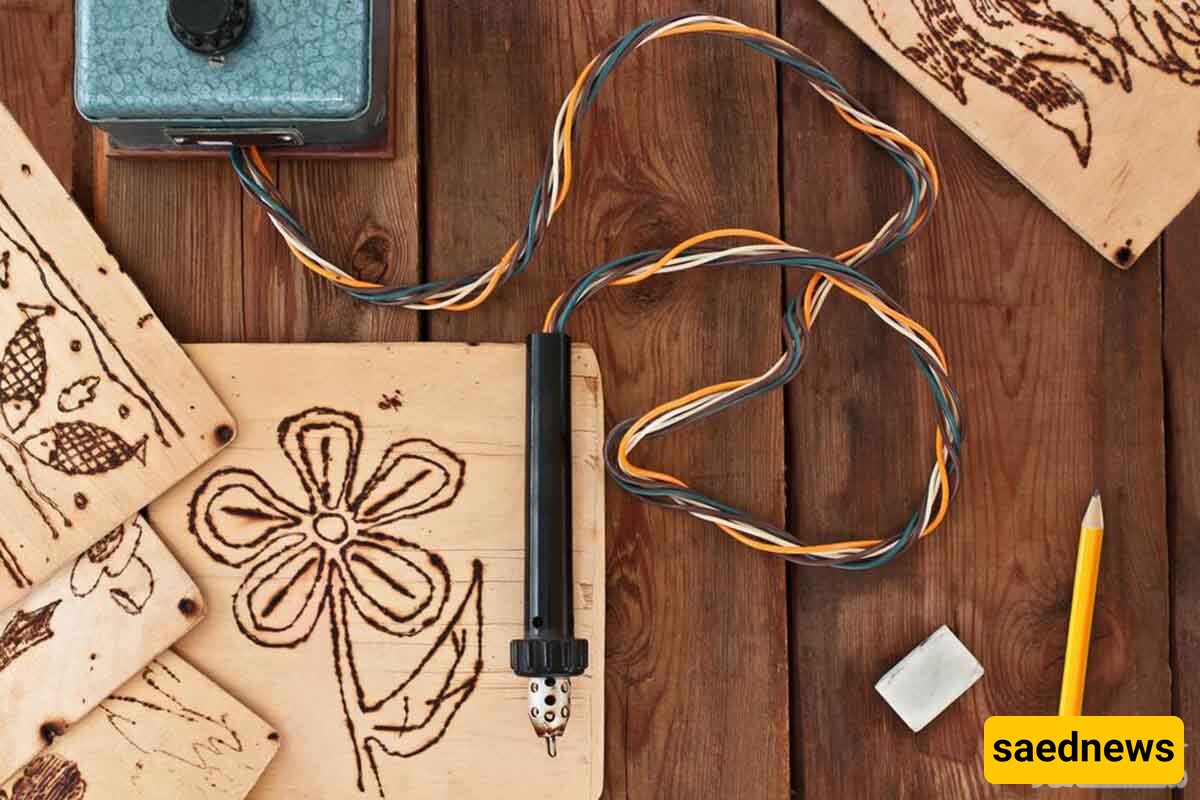
In the early 20th century, the electric soldering iron made pyrography easier, popularizing woodburned glove boxes and other artworks. Pyrography remains a traditional local art in many parts of Europe (Romania, Poland, Hungary) and South America (Argentina and others).
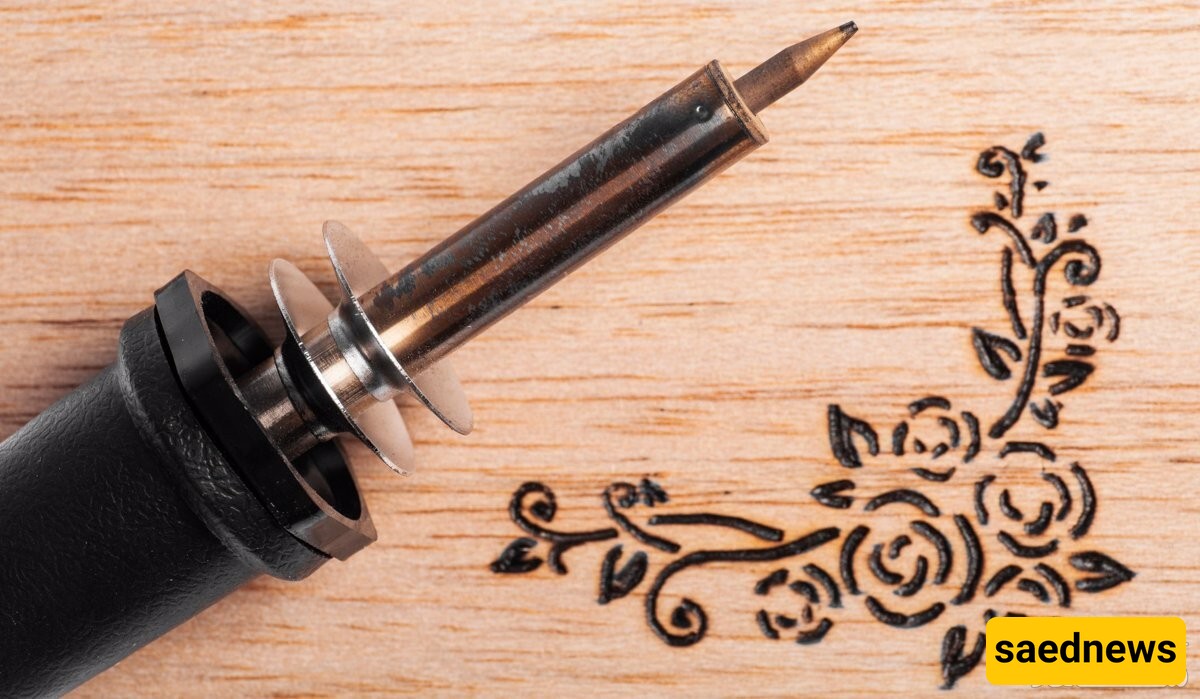
Pyrography tools are low-cost and can be used in home workshops or woodworking shops. It’s an inexpensive art form—just get the pyrography tools and start creating beautiful art. The tools include the soldering iron, wood, sandpaper, carbon paper, charcoal, and design sketches.
Soldering iron:
Those using a heating element for heat generation.
Those using direct current and high amperage to heat a wire-shaped tip.
Sandpaper:
The sandpaper needed depends on your wood. If your wood is well-cut and relatively smooth, you can prepare it using sandpapers graded by numbers—the lower the number, the coarser the grit.
You should sand in three stages: start with coarse sandpaper (e.g., 120 grit), then move to finer ones (e.g., 400 grit), and finally polish with very fine sandpaper (800 grit or more) for a smooth surface.
Wood, leather, cardboard, and paper:
Pyrography can be performed on most woods, but some woods burn more beautifully. Because pyrography produces brown color tones, lighter woods are better as the contrast shows more clearly.
Some light woods like pine and mulberry are not good for burning because their grain is harder than the rest of the wood, causing inconsistent burning and uneven color.
Maple is one of the best woods for pyrography because it is neither too hard to burn nor too soft to cause the tip to sink in. Other suitable woods include pear, bitter orange, white walnut, and poplar. If suitable wood is unavailable, wood veneers are a good option—affordable and suitable for large practice pieces.
Leather burning means applying dark colors on leather to create designs on the canvas and assembling them together. Only a few veteran masters remain today. This type sometimes includes all usual leather decorations.
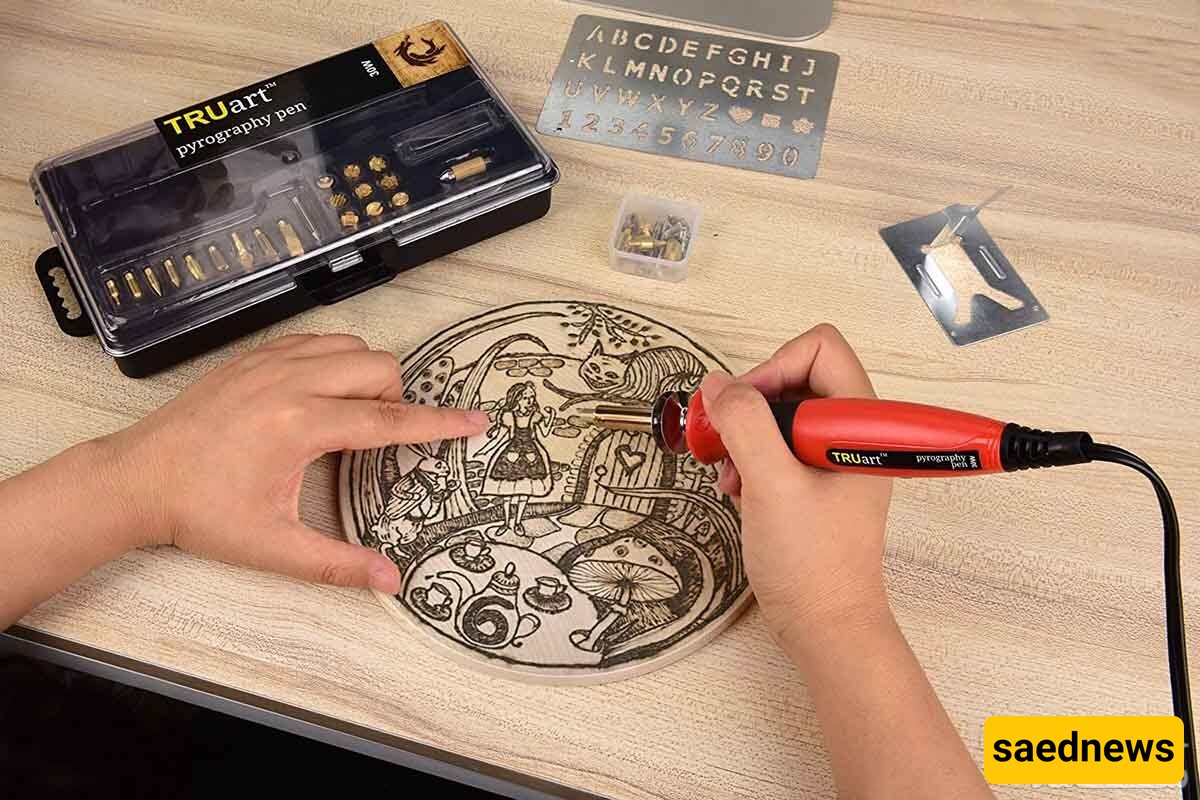
Key features include the number of tips, knives, and stencils. One important factor is temperature control (having a dimmer to adjust heat).
This device uses high-voltage electric current on non-conductive materials like wood to create tree- or lightning-like patterns by burning the wood.
Because it uses burnt colors—opaque, cooked colors—in leather burning, unlike miniature painting or Iranian painting. This is a fundamental principle of leather burning art.
Because it creates embossed designs on leather pieces by stamping or heated tools.
Usually, books had multiple copies, so leather bookbinding by burning tools with elaborate designs was rare. Instead, embossing with metal stamps was common.
If you don’t have suitable wood or leather, heavy cardboard or even paper can be used.
For starting, a suitable design is necessary, preferably a simple one to avoid frustration since pyrography is more difficult than it seems. It’s best to proceed step-by-step patiently.
Use black or yellow carbon paper, with yellow preferred because it leaves faint marks that don’t interfere with the shading by the soldering iron. Avoid blue carbon as it smudges and spoils the design.
Accuracy is crucial; slightest distraction ruins the work. Balance of contrast on the wood is important.
The art mainly uses two colors—brown and golden—and their shades define the beauty of the piece. The artist must skillfully balance these contrasts after selecting a design.
The artist must stay fully focused, as any timing or pressure variation alters color or causes the hot tip to dig in, ruining the piece. Breathing is often held to maintain control.
Fast, light strokes create fine, shaded lines; slow strokes create darker lines. The angle of the tip affects line thickness.
Pyrography can be used alone or combined for depth, 3D effects, and shading, giving stunning results.
It’s done with controlled flames (atomic lighters), specialized soldering irons, and hot sand (for shading).
You can add color after burning for added beauty. Sometimes coloring enhances the piece; sometimes it’s better left natural.
With scientific progress, laser pyrography is now possible, offering a good home income source for enthusiasts.
Prepare the wood: Select a piece and sand it progressively with coarse to fine sandpaper, finishing with natural leather to polish and remove wood dust.
Seal the wood (optional for large pieces): Apply a 50-50 solution of sealer and quick thinner on edges and back to prevent warping, leaving the main surface bare to seal after work.
Transfer design: Use carbon paper gently to avoid indentations that hinder soldering iron movement. For soft wood, mark dots lightly. Colored pencils can help track progress. Use white or yellow carbon for dark woods.
Practice: Use a same-type wood piece to test heating levels on squares, adjusting temperature gradually. No pressure is needed during burning.
Protect the finished work: Apply matte or glossy spray finish, or traditionally alcohol-based lacquer.
Handle safety: Keep fingers away from hot tips but close enough for detail control. Use a pen holder during breaks to protect workspace and body. Always pull the pen toward yourself for better control.
Work depth: For large shaded areas, start with surface lines, gradually darkening to achieve proper light-dark values. You can always darken, never lighten.
Ventilation: Use a carbon filter fan to remove smoke, as some woods produce harmful fumes.
Sure! Here's the English translation of your text:
Move the wood in the best possible position for each stroke. Sometimes both the wood and the soldering iron tip need to move simultaneously, and other times only the wood or only the soldering iron should be moved.
Light and quick strokes of the pen create faint and shaded lines, while slow strokes produce darker lines. The angle of the pen tip can also affect whether the lines are thick or thin.
Higher quality burners generally have a temperature control feature that allows you to adjust the heat from 500 to 900 degrees Celsius. Lower quality pyrography tools usually have a temperature setting up to around 600 degrees.
Carbon is not a good conductor of heat; therefore, keeping the pen tip clean results in more consistent outcomes. A clean tip allows heat to transfer more steadily and evenly to all parts of the tip. So, clean your woodburning pens. You can use sandpaper to remove the excess carbon buildup on the pen tip.
When you are not using the soldering iron, turn it off to avoid the risk of fire.